The ESP32 is currently being integrated with the Arduino IDE like it was done for the ESP8266. There’s an add-on for the Arduino IDE that allows you to program the ESP32 using the Arduino IDE and its programming language. In this tutorial we’ll show you how to install the ESP32 board in the Arduino IDE for Windows. If you’re using Mac Os or Linux follow these instructions instead.
You may like: ESP32 vs ESP8266 – Pros and Cons

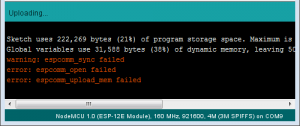
If you have any problems during the installation procedure, take a look at the ESP32 troubleshooting guide.
If you like the ESP32, enroll in our brand new course: Learn ESP32 with Arduino IDE.
Recommended reading: Getting Started with ESP32 Dev Module.
Installing the ESP32 Add-on on Arduino IDE
Important: before starting this installation procedure, make sure you have the latest version of the Arduino IDE installed in your computer. If you don’t, uninstall it and install it again. Otherwise, it may not work. Having the latest Arduino IDE software installed from arduino.cc/en/Main/Software, continue with this tutorial.
IMPORTANT NOTE:
- If this is your first time installing the ESP32 on the Arduino IDE, simply follow the installation procedure described below;
- If you’ve already installed the ESP32 add-on using the old method, you should remove the espressif folder first. Go to the end of this post to learn how to remove the espressif folder.
1. Installing the ESP32 Board
To install the ESP32 board in your Arduino IDE, follow these next instructions:
1) Open the preferences window from the Arduino IDE. Go to Arduino > Preferences

2) Enter https://dl.espressif.com/dl/package_esp32_index.json into the “Additional Board Manager URLs” field as shown in the figure below. Then, click the “OK” button:

Note: if you already have the ESP8266 boards URL, you can separate the URLs with a comma as follows:
https://dl.espressif.com/dl/package_esp32_index.json,
http://arduino.esp8266.com/stable/package_esp8266com_index.json
3) Open boards manager. Go to Tools > Board > Boards Manager…

4) Search for ESP32 and press install button for the “ESP32 by Espressif Systems“:

5) That’s it. It should be installed after a few seconds.
2. Deleting the espressif folder
If this is your first time installing the ESP32 on Arduino IDE you can ignore this section.
If you’ve followed the older installation procedure and you’ve manually installed the ESP32 add-on with Git GUI, you need to remove the espressif folder from your Arduino IDE.
To find your espressif folder and Arduino IDE location (installation path), open your Arduino IDE and go to File > Preferences:

Copy the location from the “Sketchbook location” field:
Go to your Arduino IDE location directory: C:\Users\ruisantos\Documents\Arduino and open the hardware folder:

Then, delete the espressif folder:

Testing the Installation
Plug the ESP32 board to your computer. Then, follow these steps:
1) Open the Arduino IDE
2) Select your Board in Tools > Board menu (in my case it’s the DOIT ESP32 DEVKIT V1)

3) Select the Port (if you don’t see the COM Port in your Arduino IDE, you need to install the ESP32 CP210x USB to UART Bridge VCP Drivers):
4) Open the following example under File > Examples > WiFi (ESP32) > WiFi Scan

5) A new sketch opens:

6) Press the Upload button in the Arduino IDE. Wait a few seconds while the code compiles and uploads to your board.

7) If everything went as expected, you should see a “Done uploading.” message.

8) Open the Arduino IDE Serial Monitor at a baud rate of 115200:

9) Press the ESP32 on-board Enable button and you should see the networks available near your ESP32:

Wrapping Up
This is a very basic tutorial that illustrates how to prepare your Arduino IDE for the ESP32 on a Windows PC. To install the Arduino IDE on Mac OS or Linux, follow these instructions instead. If you encounter any issues during the installation procedure, take a look at the ESP32 troubleshooting guide.
You might also like reading:
Thanks for reading.
文章转自:https://randomnerdtutorials.com/installing-the-esp32-board-in-arduino-ide-windows-instructions/


